Article 33: Website Photography Tips for Small Business
📅 Publish Date: February 13, 2026 (Friday)
Meta Information
| Field | Value |
|---|---|
| Focus Keyphrase | website photography small business |
| SEO Title | Website Photography Small Business: Complete Visual Guide |
| Meta Description | Master website photography for small business success. Learn DIY photo tips, equipment recommendations, and strategies to showcase products and services professionally. |
| Slug | website-photography-small-business |
Full Article Content (~3000 words)
Website Photography Small Business: The Complete Guide to Stunning Visuals
Effective website photography for small business transforms ordinary websites into powerful conversion tools. After all, humans process visual information 60,000 times faster than text. Consequently, the photos on your website communicate your quality and professionalism before visitors read a single word.
However, many small business owners struggle with website imagery. Specifically, they either use generic stock photos that feel impersonal or upload low-quality snapshots that undermine their credibility. According to MDG Advertising research, content with relevant images receives 94% more views than content without visuals.
This comprehensive guide covers everything you need to know about creating professional website photos without breaking your budget.
Why Quality Photos Matter for Your Website
Website photography directly impacts how visitors perceive your business. Therefore, understanding this impact helps justify the investment in quality imagery.
First impressions happen in milliseconds when visitors land on your site. Specifically, research from Google shows users form aesthetic judgments within 50 milliseconds. Consequently, your photos communicate your brand quality instantly, before any conscious evaluation occurs.
Poor quality photos create negative associations that extend beyond the images themselves. For instance, visitors assume businesses with blurry, dark, or amateur photos also deliver poor quality products and services. In contrast, professional imagery suggests attention to detail and commitment to excellence throughout your operations.
Quality website photography for small business also improves practical metrics. Specifically, better photos increase time on site, reduce bounce rates, and improve conversion rates. Additionally, optimized images contribute to better search engine rankings through image search and page experience signals.
Trust builds faster with authentic photos of your actual business. Specifically, showing real team members, real products, and real workspaces creates connection that generic stock photos cannot achieve. Furthermore, authenticity helps visitors imagine working with you before they ever make contact.
Types of Photos Every Small Business Website Needs
Different pages on your website require different types of imagery. Therefore, planning your photography needs before shooting helps ensure you capture everything necessary.
Hero Images
Hero images appear prominently at the top of your homepage and key landing pages. Consequently, these images need to make strong first impressions while communicating your brand message clearly.
Effective hero images show your business in action or your products in context. For instance, a restaurant might show a beautifully plated signature dish. Similarly, a service business might show team members helping satisfied customers. Additionally, these images should feel aspirational while remaining authentic to your actual business.
Hero images need high resolution since they often span the full width of desktop screens. Specifically, aim for at least 1920 pixels wide with appropriate height for your design. Furthermore, consider how the image will crop on different devices and screen sizes.
Product Photos
If you sell physical products, quality product photography directly impacts sales. Specifically, customers cannot touch or examine products online, so photos must convey quality, size, and details accurately.
Multiple angles help customers understand products completely. For instance, show front, back, side, and detail views for each product. Additionally, include photos showing products in use or in context to help customers visualize ownership.
Consistent styling across product photos creates professional presentation. Specifically, use the same background, lighting, and composition approach for all products. Consequently, your product pages feel cohesive rather than haphazard.
Team and Staff Photos
People connect with people, not faceless businesses. Therefore, showing your team humanizes your brand and builds trust with potential customers.
Professional headshots work well for about pages and team directories. Specifically, consistent backgrounds and lighting across all team photos create polished presentation. Additionally, ensure everyone appears approachable and professional simultaneously.
Candid photos showing team members at work add authenticity. For instance, capture genuine moments of collaboration, customer interaction, or focused work. However, avoid obviously staged “candid” photos that feel forced and inauthentic.
Behind-the-Scenes Photos
Showing your process builds transparency and trust. Specifically, behind-the-scenes photos let customers see how you create products or deliver services.
Process photos work particularly well for service businesses and craftspeople. For instance, a bakery might show bread being shaped and baked. Similarly, a web design agency might show team members collaborating on projects. Additionally, these photos differentiate you from competitors who only show final results.
Workspace photos help customers understand your environment and capabilities. For instance, showing clean, organized facilities suggests professional operations. Furthermore, specialized equipment or impressive workspaces can demonstrate expertise and investment in quality.
Customer and Project Photos
Showing your work in action provides social proof and demonstrates capabilities. Therefore, capturing customer interactions and completed projects adds valuable content for your website.
With permission, photograph satisfied customers using your products or receiving your services. Specifically, these images feel more authentic than posed stock photos. Additionally, they provide opportunities for accompanying testimonials that reinforce credibility.
Portfolio photos showcase your best work for service businesses. For instance, contractors should photograph completed projects. Similarly, designers should capture final deliverables in context. Furthermore, document projects throughout the process to show your professional approach.
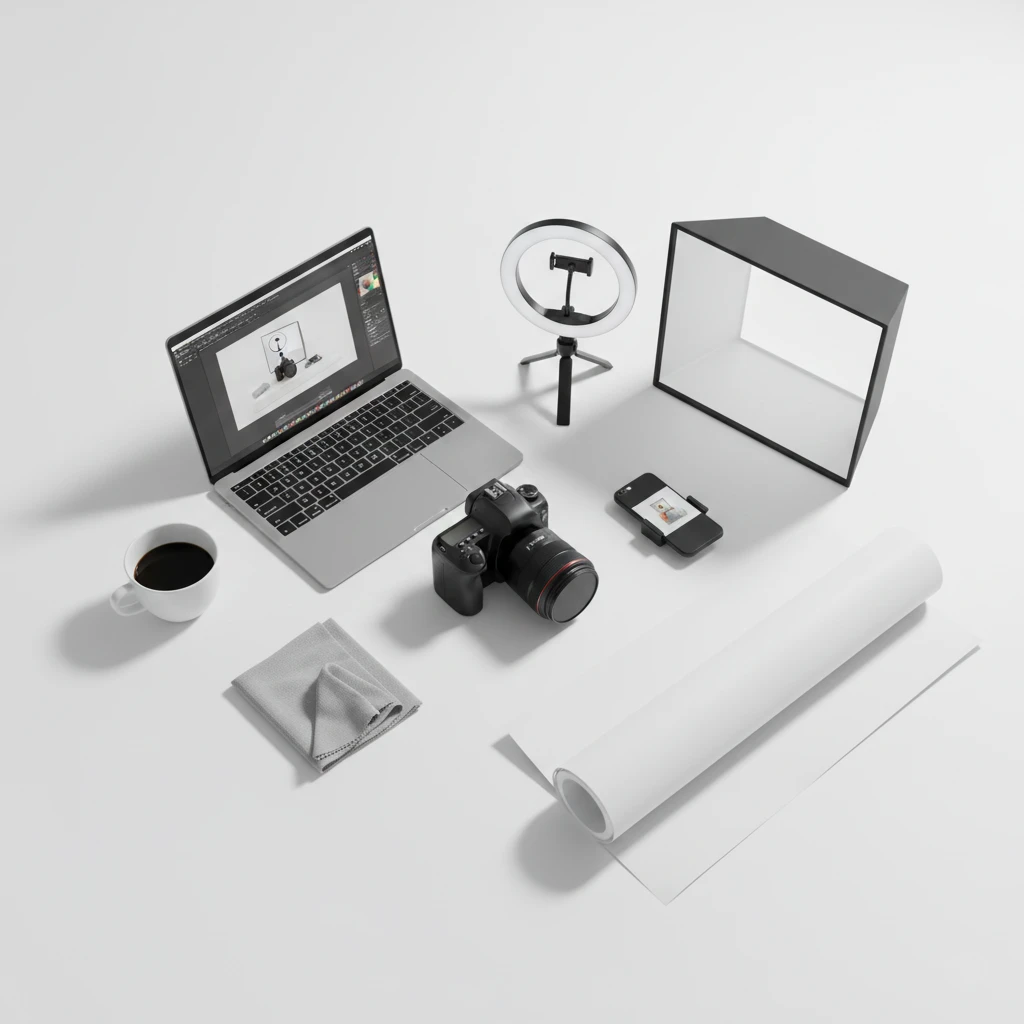
Essential Equipment for DIY Business Photography
Professional website photography for small business doesn’t require expensive equipment. However, having the right basic tools makes quality results much easier to achieve.
Camera Options
Smartphone cameras have improved dramatically and work well for many business photography needs. Specifically, recent iPhone and Android flagship phones capture excellent images in good lighting conditions. Furthermore, smartphone cameras offer convenience since you likely already own one.
For better control and quality, consider a mirrorless or DSLR camera. Specifically, entry-level models from Canon, Nikon, or Sony provide significant improvements over smartphones. Additionally, interchangeable lenses allow you to optimize for different shooting situations.
Whatever camera you choose, learn its capabilities thoroughly. Specifically, understanding your camera’s settings and limitations helps you maximize results. Furthermore, consistent practice with one camera beats occasional use of expensive equipment.
Lighting Equipment
Lighting makes more difference than camera quality for most photography. Therefore, investing in lighting provides excellent return on investment for business photos.
Natural light from windows works beautifully for many situations. Specifically, position subjects near large windows during daylight hours for soft, flattering illumination. Additionally, north-facing windows provide consistent light throughout the day without harsh direct sunlight.
For controlled lighting, consider continuous LED lights designed for photography. Specifically, these lights let you see exactly how illumination affects your subject before shooting. Furthermore, LED panels are affordable, portable, and don’t generate excessive heat.
Diffusion materials soften harsh light sources. For instance, white sheets, shower curtains, or purpose-built diffusers create flattering light quality. Similarly, reflectors bounce light into shadows for more even illumination.
Backgrounds and Props
Clean, appropriate backgrounds improve photo quality significantly. Therefore, invest in simple background solutions for product and portrait photography.
Seamless paper rolls provide clean, solid-color backgrounds in various sizes. Specifically, white and gray work for most products while colors can match your brand. Additionally, paper backgrounds are affordable and replaceable when they become worn.
For product photography, consider textured surfaces that complement your items. For instance, wood, marble, or fabric backgrounds add visual interest without distracting from products. Furthermore, consistent background choices create cohesive visual presentation across your website.
Props should enhance without overwhelming your main subject. Specifically, choose items that provide context or scale without competing for attention. Additionally, keep props consistent with your brand aesthetic and target audience expectations.
Tripod and Stabilization
Camera shake ruins otherwise good photos. Therefore, stabilization equipment helps ensure consistently sharp images.
A sturdy tripod provides maximum stability for any camera. Specifically, tripods enable longer exposures, consistent framing, and hands-free operation. Additionally, tripods allow precise positioning for product photography where consistency matters.
For smartphone photography, inexpensive phone tripod mounts work well. Similarly, small tabletop tripods provide stability for product shots. Furthermore, any stabilization improves results compared to handheld shooting.
Lighting Techniques for Professional Results
Lighting quality separates amateur snapshots from professional website photography for small business. Fortunately, understanding basic lighting principles helps you achieve better results with any equipment.
Understanding Natural Light
Natural light provides beautiful, free illumination when used correctly. However, the quality and direction of natural light changes throughout the day and requires adaptation.
Early morning and late afternoon light provides warm, flattering illumination. Specifically, the “golden hour” near sunrise and sunset creates dimensional lighting with soft shadows. Additionally, this light quality flatters products and people equally well.
Midday sun creates harsh shadows and unflattering contrast. Therefore, avoid outdoor shooting during the middle of the day when possible. Alternatively, move subjects into open shade where light becomes softer and more even.
Overcast days provide naturally diffused light that works well for many subjects. Specifically, clouds act as giant softboxes, creating even illumination without harsh shadows. Consequently, overcast conditions often produce better results than bright sunny days.
Window Light Techniques
Windows provide accessible, high-quality light for indoor photography. Therefore, maximizing window light helps you achieve professional results without artificial lighting.
Position subjects at 45-degree angles to windows for dimensional lighting. Specifically, this angle creates gentle shadows that add depth without harsh contrast. Additionally, side lighting reveals texture and form better than flat front lighting.
Distance from windows affects light quality significantly. Specifically, subjects closer to windows receive harder, more directional light. In contrast, subjects further from windows receive softer, more diffused illumination. Therefore, experiment with positioning to find optimal quality for your subjects.
White or light-colored walls opposite windows bounce light into shadows. Consequently, rooms with light walls provide more even illumination than dark rooms. Additionally, you can position white foam boards or reflectors to fill shadows manually.
Artificial Lighting Basics
When natural light isn’t available or sufficient, artificial lighting provides consistent, controllable illumination. Fortunately, effective artificial lighting doesn’t require expensive equipment or extensive expertise.
Continuous lights let you see exactly how light affects your subject. Specifically, what you see is what you get, making adjustments straightforward. Furthermore, continuous lights work well for both photo and video content.
Position your main light source at a 45-degree angle above and to the side of your subject. Specifically, this classic setup provides dimensional lighting that flatters most subjects. Additionally, adjusting the angle and distance fine-tunes the effect for specific needs.
Softer light generally looks more professional than hard, direct light. Therefore, diffuse your light sources with softboxes, umbrellas, or diffusion panels. Consequently, shadows become gentler and skin tones more flattering.
Composition Principles for Better Photos
Good composition guides viewers’ eyes and creates visual impact. Therefore, understanding basic composition principles improves your website photography for small business significantly.
Rule of Thirds
The rule of thirds divides your frame into a 3×3 grid. Specifically, placing important elements along grid lines or at intersections creates more dynamic compositions than centering everything.
Most cameras and smartphones display grid overlays to help with composition. Therefore, enable this feature and practice placing subjects deliberately. Over time, effective composition becomes instinctive.
For product photography, position key features at intersection points. Similarly, for portraits, place eyes along the upper third line. Additionally, leaving space in the direction a subject faces creates more comfortable compositions.
Leading Lines
Lines within your frame guide viewers’ eyes through the image. Therefore, using lines deliberately creates flow and draws attention to important elements.
Natural leading lines exist in most environments. For instance, tables, shelves, walkways, and architectural elements provide lines you can leverage. Additionally, you can arrange products or props to create leading lines intentionally.
Lines should lead toward your main subject, not away from it. Specifically, analyze where lines in your frame direct attention. Consequently, repositioning your camera or subjects optimizes how lines support your composition.
Depth and Dimension
Flat, two-dimensional photos feel less engaging than images with depth. Therefore, creating dimension through composition choices improves visual impact.
Foreground, middle ground, and background elements add depth to scenes. Specifically, include elements at different distances from the camera to create layers. Additionally, this layering helps viewers feel immersed in the image rather than looking at a flat surface.
Shallow depth of field separates subjects from backgrounds. Specifically, using wider apertures blurs backgrounds while keeping subjects sharp. Consequently, this technique draws attention to your main subject while creating professional-looking dimension.
Negative Space
Empty space in your composition serves important purposes. Specifically, negative space provides visual rest, draws attention to subjects, and creates sophisticated aesthetic.
Products often photograph best with generous negative space around them. Consequently, the product becomes the clear focus without competing visual elements. Additionally, negative space allows room for text overlays if needed for marketing materials.
Don’t fear empty areas in your compositions. Instead, use negative space intentionally to strengthen visual impact. Furthermore, negative space often distinguishes professional photography from amateur snapshots.
Editing Photos for Web Use
Even great photos benefit from editing before web publication. Therefore, basic editing skills help you optimize images for your website.
Essential Editing Adjustments
Several adjustments improve nearly every photo. Fortunately, these basic edits require minimal skill and produce significant improvements.
Exposure adjustments correct images that are too dark or too bright. Specifically, adjust overall brightness first, then fine-tune highlights and shadows separately. Consequently, you recover detail lost in initial capture.
White balance correction ensures colors appear natural and accurate. Specifically, indoor lighting often creates yellow or blue color casts that editing removes. Additionally, consistent white balance across photos creates cohesive visual presentation.
Contrast adjustments add visual punch and dimension. However, excessive contrast looks unnatural and damages detail in highlights and shadows. Therefore, apply contrast subtly for professional results.
Sharpening improves apparent detail and clarity. Specifically, most digital photos benefit from slight sharpening before use. However, over-sharpening creates ugly artifacts, so apply this adjustment conservatively.
Cropping improves composition after capture. Specifically, remove distracting elements and strengthen composition by cropping thoughtfully. Additionally, crop to appropriate aspect ratios for your website design.
Editing Software Options
Various software options suit different skill levels and budgets. Therefore, choose tools that match your needs and technical comfort.
Adobe Lightroom provides professional editing capabilities with reasonable learning curve. Specifically, Lightroom excels at batch processing multiple photos consistently. Additionally, subscription pricing includes regular updates and cloud storage.
Canva offers basic editing with user-friendly interface. Specifically, Canva works well for simple adjustments and adding graphics or text. Furthermore, free tier provides adequate functionality for many small business needs.
Smartphone editing apps like Snapseed or VSCO provide powerful editing on mobile devices. Specifically, these free apps include professional-level adjustment tools. Additionally, editing on your phone streamlines workflow when shooting with smartphone cameras.
Optimizing for Web Performance
Large image files slow down your website, increasing bounce rates. Therefore, optimizing file sizes without sacrificing visible quality improves user experience.
Resize images to appropriate dimensions for their display size. Specifically, don’t upload 4000-pixel images for 800-pixel display areas. Consequently, proper sizing dramatically reduces file sizes.
Compress images using tools like TinyPNG, ShortPixel, or ImageOptim. Specifically, these tools remove unnecessary data without visible quality loss. Additionally, compression typically reduces file sizes by 50-80%.
Choose appropriate formats for different image types. Specifically, JPEG works well for photographs while PNG preserves transparency. Furthermore, WebP format provides excellent compression for modern browsers.
Industry-Specific Photography Tips
Different industries have unique website photography for small business requirements. Therefore, consider these specific recommendations for common small business types.
Restaurants and Food Service
Food photography requires special attention to freshness, color, and appetite appeal. Specifically, photograph dishes immediately after plating when they look most appetizing. Additionally, steam, glistening textures, and vibrant colors communicate freshness.
Natural light typically produces the most appetizing food photos. Specifically, position dishes near windows for soft, directional illumination. Furthermore, avoid flash which often creates harsh, unflattering shadows on food.
Show your dining atmosphere as well as individual dishes. Specifically, capture your restaurant’s ambiance, seating, and overall experience. Consequently, visitors can envision dining with you before making reservations.
Retail and Products
Product photography requires consistency and accuracy. Specifically, customers need accurate representations to make purchasing decisions. Additionally, consistent styling across products creates professional presentation.
Multiple angles and detail shots help online shoppers evaluate products. Specifically, show products from all relevant perspectives. Furthermore, include close-ups of important features, textures, or craftsmanship details.
Lifestyle shots showing products in use add context and aspiration. Specifically, help customers envision products in their own lives. Additionally, lifestyle imagery often converts better than isolated product shots alone.
Service Businesses
Service businesses benefit from process and people photography. Specifically, show your team delivering services and interacting with satisfied customers. Additionally, document your workspace, tools, and professional approach.
Before-and-after photos demonstrate transformation and results. Specifically, contractors, cleaners, designers, and similar services should document their impact visually. Furthermore, consistent photo documentation builds an impressive portfolio over time.
Team photos humanize service businesses effectively. Specifically, show the people customers will actually work with. Additionally, candid photos of your team in action feel more authentic than formal posed portraits alone.
Real Estate
Real estate photography requires wide-angle coverage and attention to staging. Specifically, capture full rooms showing layout, light, and flow. Additionally, declutter and stage spaces before photographing to maximize appeal.
Exterior and neighborhood photos provide important context. Specifically, show the building, landscaping, parking, and surrounding area. Furthermore, neighborhood amenities and nearby attractions add value for potential buyers or tenants.
Natural light enhances real estate photos significantly. Specifically, shoot during daytime with lights on for warm, inviting illumination. Additionally, twilight exterior shots create dramatic, aspirational imagery for high-end properties.
When to Hire a Professional Photographer
DIY photography works well for many situations. However, sometimes hiring a professional makes more sense for your website photography for small business needs.
Consider hiring a professional when images are critical to your business success. Specifically, hero images, key product photos, and primary marketing materials deserve professional treatment. Additionally, businesses in visually-driven industries like restaurants, retail, and real estate often benefit significantly from professional photography.
Technical complexity sometimes exceeds DIY capabilities. For instance, large product catalogs, architectural interiors, or specialized food photography require expertise and equipment beyond typical small business resources. Furthermore, professionals complete complex shoots faster and more consistently.
Time constraints also justify professional help. Specifically, your time has value, and photography can consume significant hours. Therefore, hiring a professional might cost less than the opportunity cost of DIY shooting.
When hiring, review portfolios for relevant experience. Specifically, choose photographers whose style matches your brand and whose previous work demonstrates competence in your type of photography. Additionally, discuss your specific needs, usage rights, and deliverable specifications before booking.
Next Steps for Your Website Photography
Ready to improve the visual presentation of your website? Start with these priority actions:
First, audit your current website photos for quality and consistency issues. Second, identify which photo types you need most urgently. Third, gather basic equipment and start practicing with available light. Finally, establish a system for photographing new products, projects, and team members consistently.
Quality website photography builds over time through consistent effort. Therefore, start capturing better images today and continuously improve your visual content.
Get Professional Help with Your Website
Great photography deserves a great website to showcase it. At Monir Tech Solutions, we specialize in creating beautiful, fast-loading websites for small businesses including restaurants, retail stores, and real estate professionals.
Our team delivers:
- Professional website design that showcases your photos beautifully
- Mobile-responsive layouts that display images perfectly on all devices
- Optimized image loading for fast performance
- SEO optimization to help customers find you online
- 24/7 support so you’re never left without help
- Budget-friendly pricing with no hidden monthly fees
Ready to showcase your business with a professional website?
👉 Get a Free Quote — Tell us about your project and receive a customized quote with no obligation.
👉 Schedule a Free Consultation — Book a no-obligation call to discuss your website and photography needs with our team.
Your photos deserve a website that presents them professionally. Let’s build something that converts visitors into customers.